
Getting started
mGalaxy is actually 2 applications:
- mGalaxy_Runway, which is used to configure the systems and their database.
- mGalaxy which is the “visible” part.
This decoupling has been planned for several reasons, but in particular to preserve the main part from false manipulations by your children or friends during wild games.
We will start by creating a system and this is done in mGalaxy_Runway.
Create a system to emulate
Section titled “Create a system to emulate”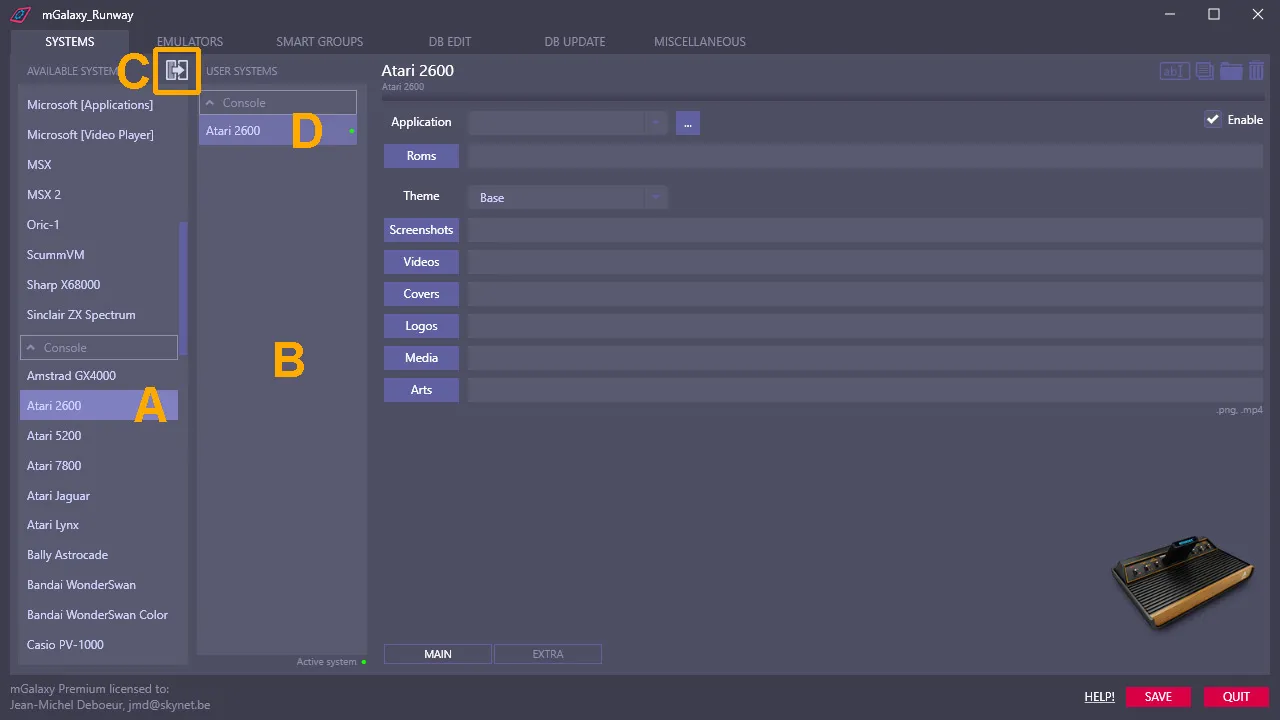
- drag and drop it into the column on its right [B]
- double click on it
- click on this icon [C]
…a new system has been created! [D]
Choose an emulator
Section titled “Choose an emulator”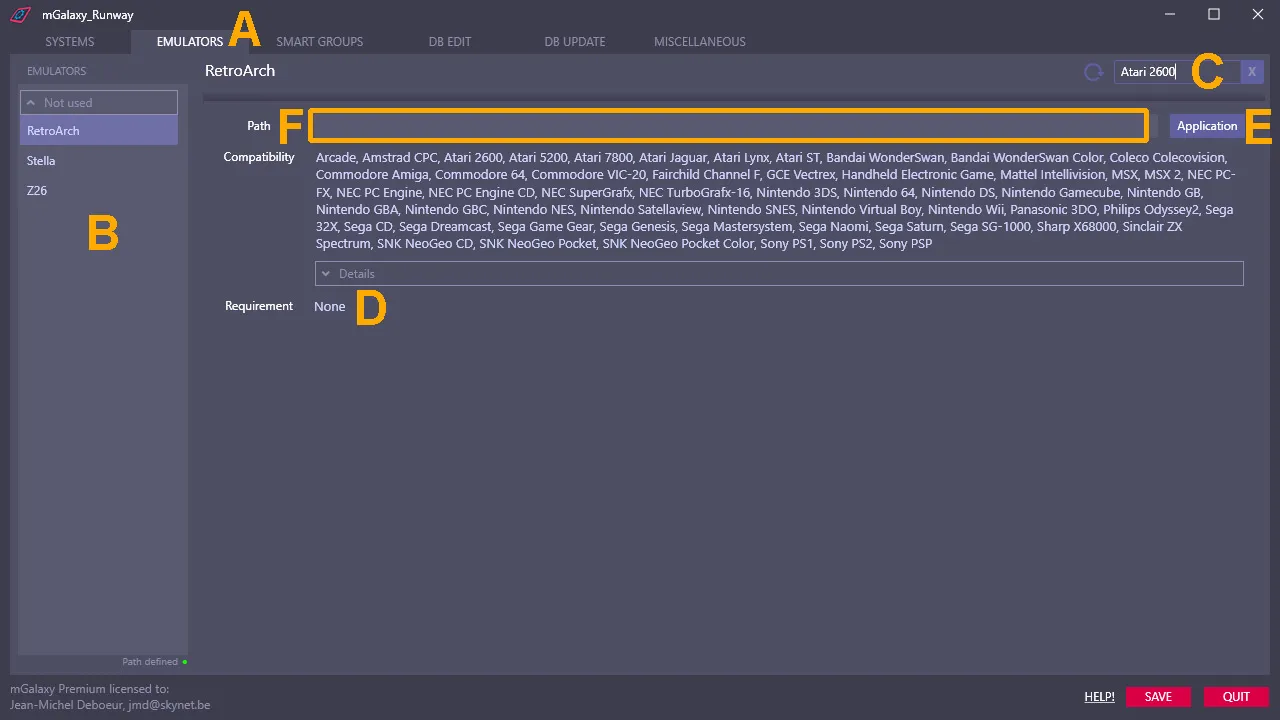
- Click on the “EMULATORS” tab [A]
- In the left column, all emulators recognized by mGalaxy [B]
- We will limit the display of emulators to the system we have chosen, the Atari 2600. To do this, in the field reserved for filtering, type “Atari 2600” [C] Tip: note that this filter field works for both emulator names and system names.
- The list is now reduced to 3 emulators. It is among these 3 emulators that we will make our choice later. The important thing here – and this is the reason why we went through this step – is to check in the requirements that there is nothing special to know for the proper functioning of this emulator. [D]
Download the emulator of your choice and install it. You can then indicate the path in either:
- clicking on this button to open a selection window [E]
- dragging/dropping the application directly into the field [F]
- typing the path directly in the field [F]
Last step
Section titled “Last step”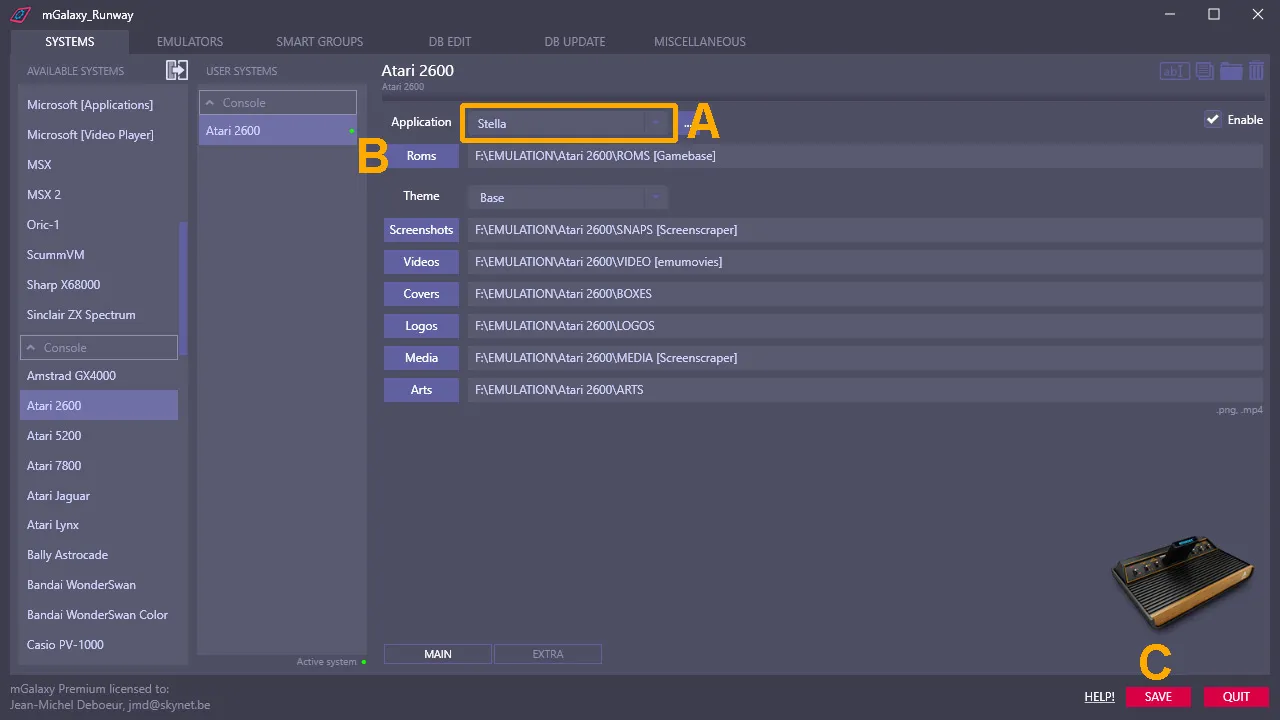
Go further by creating a database of games
Section titled “Go further by creating a database of games”It is then suggested that you create a database and bring back the media/text elements to enhance your game experience. The “DB Update” tab explained